Happy to see you again! Now you know a little bit about skiing, and, I hope, want to improve your theoretical knowledge and your skiing skills. I think that you are here because you are tired of the wedge turns and want to become a parallel skier. I created this page to show you some good exercises that will improve your skiing technique and help you become a parallel skier. So, let’s go then.
As we discussed before, the most important skill in skiing is balance. If you are in a balanced position, you can do whatever you want on your skis. So what is your balanced position?
Feet shoulder-width apart, distance between your feet 10-12 inches, knees bent, feel the pressure from the tongues of your boots on the shins, arms in front of you with elbows slightly bent.
Feeling the pressure on your shins from the tongues is very important. When skiing, you should always feel that pressure from the tongues of your boots. On the downhill ski, the pressure has to be stronger to make the turns possible, while in the uphill boot your shin should be just touching the tongue. It is very important that you do the exercises listed below in order to improve your skiing skills.
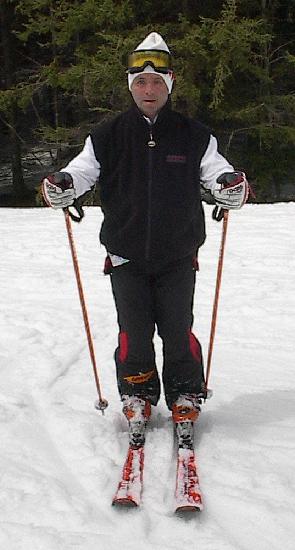
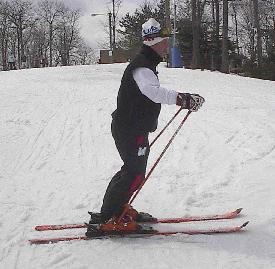
1. Traverse with a step. From our good stance position, let’s traverse down the hill. (Traverse is a maneuver when we cross a big part of terrain without or slightly loosing altitude). While traversing the hill, try to lift and step with your uphill ski. Traverse across, making three or four lifting steps and then make a turn. Do it in both directions, starting with a lower speed, paying maximum attention to your stance and balance. From run to run, slightly increase speed and pressure on your downhill ski.
2. Do the same keeping the tip of your uphill ski on the snow.
3. Do the same with the tail of your uphill ski on the snow.
4. Do the same with lifting your uphill ski completely from the snow and traversing for a few seconds on one ski.
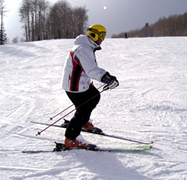
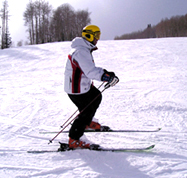
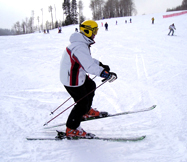
5. From the same stance and on the same terrain, while traversing across the hill try to keep tips of your skis together and the tail of your uphill ski brushing the slope in the uphill direction and returning into the position parallel to the downhill ski.
6. Traverse with side-slipping. Work on edge release and engagement while traversing.
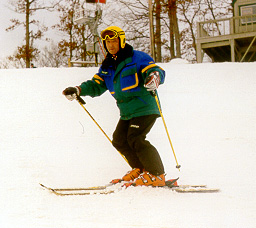
7. Falling leaf with a side slip. Picture the way a leaf falls off the branch. It makes a nose dive, then shifts direction and falls stem first, then nose dive again, etc. Without rocking or moving the body, press forward on the tips of the skis and let them slip forward. More pressure on the balls of the feet moves ski forward. Skis come to a stop because they are edged and turned slightly uphill. Allow the pressure to move toward the hill while maintaining the same amount of edging. The skis will begin to slip diagonally backward. Begin to twist the feet gently so that the tips of the skis will drift downhill faster than the tails. As the skis begin to slow, again press onto the balls of the feet to get skis moving forward. Applying pressure on the balls of your feet on flat skis will move the tipstowards the fall line. Doing the same while edging skis will turn skis uphill.
8. Hockey stops to both sides. Hockey stop is a stop with matched skis, creating the upper and lower body separation and a countered stance, when legs and feet turn actively against the upper body. Do a straight run then turn the skis sideways, feet going either right or left. This is a quick pivoting movement of the legs and feet underneath the stable body. The upper body should remain facing the fall line. The goal is to stop while maintaining balance and weight over the downhill ski.
If you feel that when you are finishing a turn you have to make a step with your uphill ski that means that you are not putting enough pressure on your down hill ski. Try to bend your downhill leg a little bit more and put a little bit more pressure on the tongue of you downhill boot. In this case, your uphill ski will become lighter and it will be easier for you to make a turn
Now lets work on another common problem. A lot of skiers in the initial stages of training begin their turns from the upper body, and that is understandable because this is a more natural way for us humans, since the muscle mass is much bigger in our upper bodies. In skiing, we have to change our ways a bit. The closest parts of your body to the skis are your feet. You have to begin the turn from your feet. We will talk more about it later, but always keep that in mind.
Now some more exercises that will help you improve you balance and overall technique. The purpose of this set is to ensure proper arm position. Your arms should always be in a fixed position in front of you, hands on the chest level. To make sure you know what your body balance should feel like with the proper arm positioning, let’s do the following:
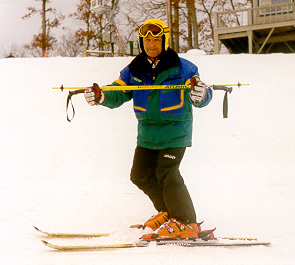
1. From your stance position, extend your arms in front you and hold your polls horizontally to the ground in your hands. From this position try to make some turns as close to the fall line as you can.
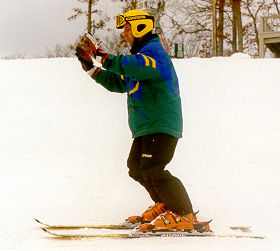
2. This exercise will be without poles. Try to imagine that in front of you there is a wall. Extend your arms in front of you and from your good stance position push that wall. That does not mean that you have to push your self forward and lean forward. It means that you have to bend your knees and apply pressure on the tongues of your boots to start moving forward with your hands “pushing” against the imaginary wall. From this position try to make a run as close to the fall line as you can.
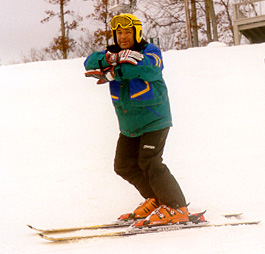
3. This exercise will be without poles. Extend your arms in front of you, bend your elbows and grab an elbow of the opposite arm with each hand. From this position try to make a run as close to the fall line as you can.
Grab each of your poles somewhere in the middle and extend you arms in front of you. Your poles have to form an imaginary “doorway” through which you want to enter. Maintaining this position, try to make a run as close to the fall line as you can
The main idea of all these exercises is to make your upper body stable and solid, looking downhill, while your legs are rolling underneath. Always keep in mind that when you are making short turns your shoulders are pointed downhill, your eyes looking forward (do not look at the tips of your skis) and your center of mass, or in other words, your hips are pointed towards the next turn.
I’m pretty sure that if you tried all these exercises and put a lot of miles on your skis in the process, you can already make turns on parallel skis. All this means is that when you are making your turns your skis are in a consistently matched position; they are parallel and not in a wedge. All modern skis made in the last 5 years have parabolic shape. This means that the radius of your turn is already determined by the shape of your skis. All you have to do is to put them on edge and apply forward pressure on your boots maintaining the balance that we’ve been working on in this set of exercises. Getting you to this point was exactly the goal of this chapter. Have a great day of skiing and good luck!


