Now you are at the point where you learn how to carve. Everybody all over the world is talking about carving because on today’s super-sidecuts skis, especially the most radical ones, you can make amazingly short radius virtually skid-free turns that make you feel like a flying angel. It is fun, it is easy, and you will be missing out if you don’t try it. You will need two things to succeed on the slopes: right skis and right technique.
First about skis. The shorter is the sidecut radius the tighter arc you can carve. Skis with sidecut radius that make turns from 7 to 14 meters provide the greatest carving versatility.
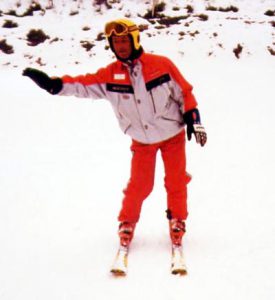
Now that you have the right skis, lets begin. First stand with feet hip width apart or wider without your skis on. Try to push your right hand sideways.
You can easily start feeling how your hips (center of mass) moving in the same direction. Now try your left side. You should be receiving the same feelings. Try all these movements in front the mirror. You should discover that one of your legs is extended while another one becomes flexed. Next try to do the same with your skis on. You will find out that your skis will be rolling from one inside edge to the other. Go down the hill on a gentle terrain doing exactly the same. What is happening? When you push to the right, your skis go to the right, and when you push to the left your skis go to the left The process of pushing helps you to move your center of mass inside the center of the turn keeping your wide stance stable. I believe that you remember that all your movements have to begin from your ankles and they have to be flexed. That promotes enhanced shin angle.
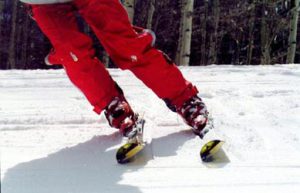
Place more weight on your downhill ski on the inside edge. In that position, on the inside edge of your downhill ski, you are applying more pressure on the side of your big toe. Now, to make a turn, try to move pressure on your downhill ski from your big toe to your little toe at the same time pushing your hand. To do this simply roll your ankles downhill. For example you are going to the right, more weight is going to be on your left leg on the inside edge (side of your big toe) and pushing your right hand. Now roll your ankles from right to the left and changing your pushing hand from right to left. Keep in mind that the pressure has to shift from your big toe to the little toe on the downhill ski and on your uphill ski it has to shift from your little toe to your big toe. These movements have to be done simultaneously.
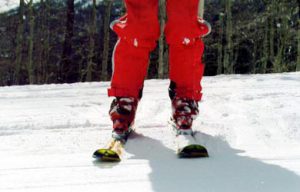
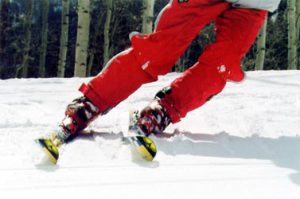
Try to imagine that you are skiing in a room with a really low ceiling so you have to limit your up and down motions. Think about your lower body rolling underneath your stable upper body. As you are rolling your legs underneath your body, you will be creating long leg / short leg movements. Think back to when you were watching your self in the mirror. As you pushed to the side the inside leg began to shrink enabling you to take your center mass further inside the turn.
If you are making short radius turns, your upper body is always looking downhill because shorter turns require quicker edge changes and more angulation on your lower legs. Your shoulders, chest and hips face straight downhill, while your skis turn beneath them. That movements we call “cross under”. You will feel “countering” of your hips as your finish each turn, but it is not something you force. It just happens if you keep your hips still and pointing at the fall line.
If you are making GS turns, your upper body is following the tips of your skis. As your skis turn, let your hips turn at the same speed, following their lead. Keep your pelvis comfortably perpendicular to the direction of your travel. Feel yourself flow with your skis. The more comfortable you feel on the flat terrain the more you will be able to increase your speed on the slopes.
Good luck!!